Saturday, September 29, 2012

Candy Corn Pine Cones


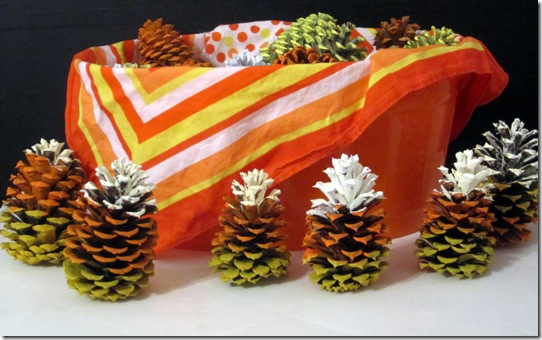
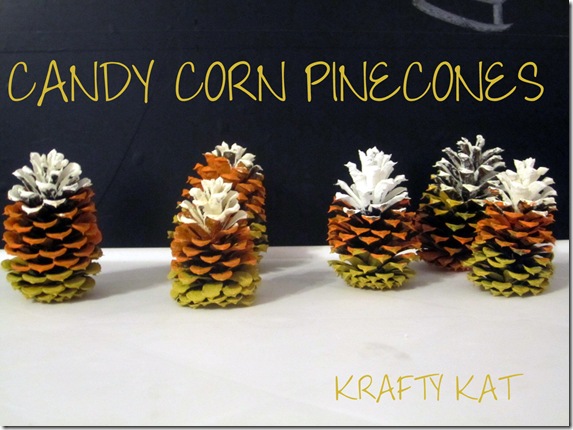
It’s no secret that I am CRAZY about candy corn!  I love the stuff.  So, it makes perfect sense for me to decorate for Fall & Halloween with my favorite candy.  Here in the South, we have an abundance of pine cones.  They are everywhere! I have been wanting to do some pine cone crafts and then (probably due to hunger), it dawned on me.  Pine cones are shaped sort of like candy corn. Why not paint them to look even more like candy corn? 
Candy Corn Pinecones {Krafty Kat}

I started by spray painting pine cones solid colors of orange, yellow, and white. 
Spray Paint & Pinecones
Spray Painted Pinecones

Then, I painted some of them in tricolors with craft paint.  I had a little help from my girls. 
painting pinecones
  
Paint Pinecones to look like Candy Corn {Krafty Kat}
I LOVE my candy corn pine cones   I am enjoying finding different ways to display them…
Painted Pinecone Garland
I strung them up on a piece of twine to make a garland on my built-ins. 
Candy Corn Pinecone Garland {Krafty Kat}
I just wrapped the twine around the top part of the cone and hung them up.  So easy!
Hang Pinecone on Twine

Pinecone Garland
I used them as a vase filler.  The bright colors look great! 
Pinecones as Vase Filler
I filled a plastic basket full of them and even just lined them up by themselves.
Basket of Pinecones

Painted Pinecones {Krafty Kat}
They make for an easy and inexpensive way to decorate for the season!
Basketful of Painted Pinecones

Are you CRAZY for candy corn?
Pin It!

Friday, September 28, 2012

Five Fall Front Porches (Gimme Five For Friday)

Fall Front Porch

One of my favorite things about fall is to see all of the gorgeous front porches decked out for fall.  They are just so warm and welcoming.  They make you want to come inside and enjoy a slice of pumpkin pie or a mug of warm apple cider.  You can create that same welcome home ambience even if you don’t have a lot of money or even a front porch.  You just have to work what you’ve got


 I love this porch (same porch as the first picture).  It’s got it all.  I love the corn husks on both sides of the entry.  Bales of hay,bushel baskets, and the scarecrow (hard to make out in this photo) add to the country harvest feel.  The baskets as well as the urns are filled with beautiful mums.  You are just drawn up the steps to the front door by pumpkins that are graduated in size as you go up.  Everything about this design pulls you in and up to the front door and the warm glowing light within.

Thaksgiving Front Porch Decorating Ideas
 This one is similar except this is fall decor that doesn’t include pumpkins.  Lots of vibrant fall color with leaves, mums, gourds,and baskets of apples.  Apples are on the giant wreath and even apples that have been stabbed by pitchforks and rakes.  So much fall goodness!

 Curb Appeal
This front porch is so balanced.  Pots of mums and hurricane lamps line the steps alongside small white pumpkins.  Paper lanterns and hanging baskets draw your eye up and the focus in the middle is a beautiful autumn wreath on the door. 


 It just can’t get any more welcoming than this!  Bring out the welcome wagon or wheelbarrow or any type of cart you may have and fill it with gourds, bittersweet and paint a greeting onto a pumpkin.  Or grab an old bike and adorn it with baskets of pumpkins and jack-o-lanterns. 

Bicycle Planter

 Fall branches with beautiful golden leaves, a few pumpkins, and a whispy grapevine wreath make for a simple yet gorgeous entry.


Photo bhg.com

Which picture is your favorite?

Are you welcoming fall at your front door?  I would love to see!

You can share your fall decor and more at Gettin’ Krafty With It on Tuesdays (link stays up until Friday). 

For photo sources and more fall front porches and other fantastic fall inspiration, visit my Fall/Thanksgiving Pinterest board! 
Pin It!

Wednesday, September 26, 2012

Free Fall Centerpiece


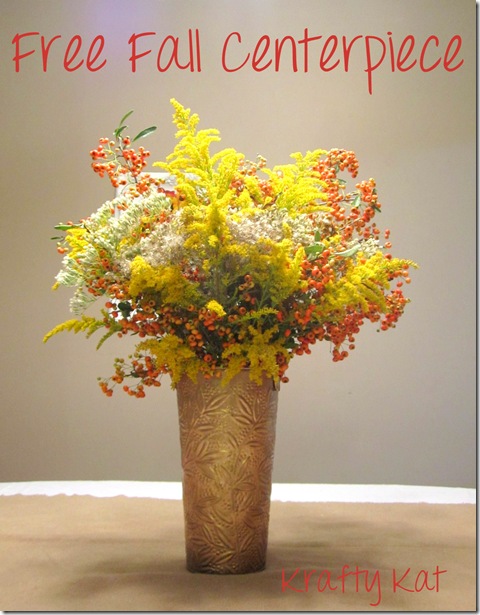
Krafty Kat {Free Fall Centerpiece}

Today, I created a fall centerpiece for our dining table that was completely FREE!  Yes, free. My fave!   Decorating for the seasons is so easy (and affordable) when you just use what nature has to offer.  We don’t have a lot of leaves falling yet but there are lots of plants offering up beautiful fall colors of gold and orange and I just couldn’t resist. 

Floral Arrangement in Dining Room

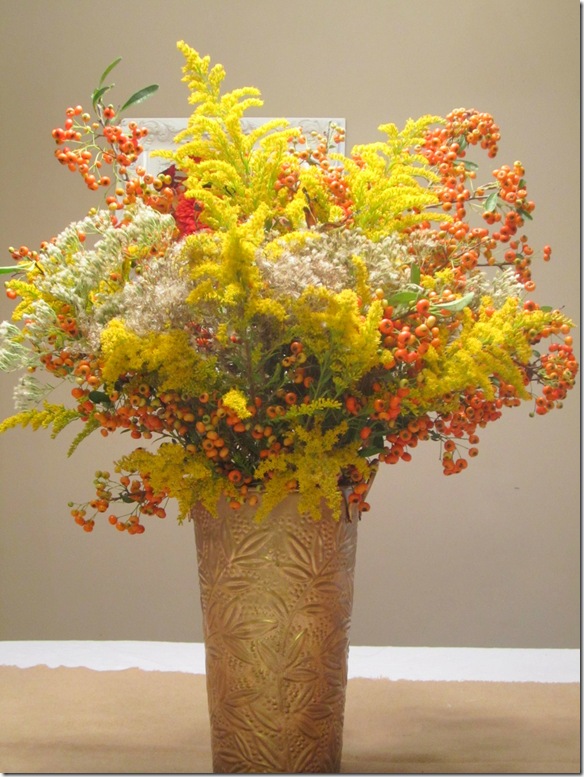
I made this autumn bouquet using goldenrod, bittersweet berries, and salt myrtle.  You can find these plants growing all over the place here in Georgia, on the side of the road, in meadows, in the woods, literally everywhere.  I just gathered a basketful and began to arrange them.

Vase Inside

I used a “tall can” that I had spray painted gold a while ago.  I put a large glass vase full of water inside.  It fit perfectly.  I then filled the vase with all of my finds. 

Fall Centerpiece

Sometimes, it seems God just sends little gifts my way.  After I had gathered my flowers, I went to our local little grocery store and right when I stepped out of my car, I spotted these butterfly wings. Somehow, this monarch butterfly had died and the body was gone and the wings had been left, perfectly preserved.  I added it to my basket and I think the little butterfly wings add the perfect touch to my arrangement.


Monarch Butterfly Wings

It may seem gross to some of you to keep them but I think they are beautiful.   I watched a nature film once about the monarchs and they are truly amazing!


Preserved Butterfly In Centerpiece

A few words of advice if you decide to pick some of these wild flowers/weeds/berries/etc.  Never trespass onto private property.  Watch out for snakes and spiders and any other creepy, crawly things.  Also, if you pick bittersweet, the oriental variety has thorns, so be careful!  Use pruning shears for those.  Before arranging, check the clippings well for insects so you don’t bring any of them into your home!  As with any plants you bring into your home, keep them away from small children and pets.  I will not even pretend to know which are poisonous and which are not, but if this is a concern, please look it up! 


Autumn Bouquet

In my opinion, real is always better than fake if you can afford it.  I have no idea what an arrangement of this size would cost but mine didn’t cost a dime and that makes me happy!   


Pin It!

Dr. Who Party With Tardis Cake

My daughter celebrated her 14th birthday last week and over the weekend had a slumber party with 3 of her friends.  She likes having a party with a small group because it’s a lot more intimate.  This little group all have a similar interest: Dr. Who. Basically, the plan was to get together, giggle, watch the show, giggle, eat some junk food, giggle, hang out, and giggle.  So, I am happy to say, it all went as planned!

Blowing Out Candles On Tardis Cake
This party was a little strange for me to plan because I have never watched Dr. Who.  Also, since she is getting older, we didn’t do a whole lot of decorating.  We did have some LED balloons just because they’re so cool.  If you haven’t seen these, you can make your own or buy them already made and they glow in the dark. I just bought these at Walmart.  Also, we had a couple of silver star streamers from the dollar store hanging from the ceiling.
image

Dr. Who Party Tardis Photo prop {Krafty Kat}
The main decoration and photo prop was the tardis.  The tardis is the “time machine” which is basically a phone booth.  She helped me make it from some of the extra foam board left over from my giant photobooth pictures.  We cut out the shape and painted the board blue.  Then we added a strip of black vinyl and she used a white paint marker to write out the words Police Box.  We drew the window panes onto white paper and mod podged them on and used a sharpie for the rest of the doors and handles.  After the party, she put the tardis up in her room. 
Tardis
The girls ate lots of chips, pizza, popcorn, cake, and ice cream.  They. of course, washed it all down with Dr. Pepper.  The tardis cake was a bit of a challenge.  The original plan was to have the tardis standing up.  I baked two cakes in loaf pans, cut off the tops so they would be flat and then cut the cake into squares and stacked them on top of eachother.
image

However, after I covered them in icing, they just toppled over and crumbled apart.  BIG FAIL! So, then, I baked another cake, again in loaf pans and this time left it that way, other than cutting off the top.  I covered the cake in moldable chocolate.  The moldable chocolate was really easy to make.  I melted a package of almond bark and stirred 1 cup of light corn syrup into it.
Almond Bark & Corn Syrup for Moldable Chocolate

image
I separated a bit out to use as white then added blue food coloring to the rest.  Then, I should have left it to sit and cool on the counter in a ball  BUT I  watched a video on how to make it in which the guy rolled it between two sheets of wax paper and I thought that was how I was supposed to cool it. So, before I could roll it out, I had to peel it apart from the wax paper and it was sticking all to it. Can we say BIG FAIL???   Once it had cooled and I had rescued as much of it as I could from the wax paper, I rolled it out and tried to cut shapes from it.  However, it wanted to stick to the counter too much.  Another BIG FAIL!  All I could do was to put a big blob on top of the cake and try to spread it and smooth it with a knife.  It was ok but not working exactly as planned.  I thought it would be like fondant.  It was too late to try anything else though, and it did taste better than fondant.  I made the windows from the white and since they were smaller, they were easier to work with.  Then, I used black icing to outline the windows, the doors, etc. The cake didn't look anything like I had hoped but by this point, I just wanted it to be done. Anything that resembled a cake would have been just fine.  


TARDIS cake

  Anyway, everyone seemed to think the cake was cool and didn’t seem to mind when we cut into it and the chocolate was soooo thick that it was like rubber!  Luckily, I had the other loaf, I mean, cake and added some plain frosting to it and they ate it. I am still fascinated with using the moldable chocolate so I will be trying it out again but probably not for a cake! ;)


The girls had a great time dressing up and doing each other’s makeup and all of that fun girly stuff.  Although the cake didn’t go exactly as planned, no one seemed to mind and I am glad to have another kid’s birthday over for the year and only 3 more to go!  Sigh. 

I never did post last year's party so I need to share that with you soon. I only shared the recipe for her Brooklyn Blackout Cake.  The party had a rockstar theme and was a lot of fun. I had at least a clue of what to do for it! :)


Don't forget to enter the
   Linking Up:
The Thrifty Home
Rae Gun Ramblings
House Of Hepworths
A Glimpse Inside
Delightful Order
Tatertots & Jello
504Main
Too Much Time
Pin It!

Tuesday, September 25, 2012

Shabby Apple $50 Giveaway


Contest Closed...Winner to be announced soon!
Close this window
 The weather’s getting cooler and you know what that means…Time to pull the fall clothing out of storage!
But, if your wardrobe is anything like mine, it could use a little help! 
That’s right...time to go shopping!
I love classic, feminine clothing with a vintage feel.  That’s why I love Shabby Apple! 


Their dresses are modest but still very flattering. 
Close this window

Not only do they have gorgeous dresses…
Pinned Image
They also have lots of skirts, blouses, shoes, accessories, and even cute maternity clothing!  

Circular coco beads penetrated by earthy textural lines form artistic chains of bold and natural color.Close this windowClose this window
Pinned ImagePinned ImageClose this window
Shabby Apple is a great site that really understands women.  They even offer free style advice and have a tool to help you shop based on your body type.  I am a bit on the voluptuous side and this shows me all of the dresses that will help me make the most of my shape. It is like having my own personal shopping assistant!

If you haven’t heard of Shabby Apple, now is the perfect time to go check them out.  Browse through their collections and I am sure you will find something that is perfect for you!
& to make things even sweeter,
Shabby Apple is offering a 10% discount to all Krafty Kat readers! 
Just use code kraftykat10off at checkout!
Not only that, but one lucky reader will receive a
$50 Gift Card! 

How To Enter:
There are 5 ways to win!  Leave a separate comment on this post for each entry.  5 comments = 5 entries.
Mandatory:
1.  Visit Shabby Apple and leave a comment on which dress or item is your favorite!
Extra Entries:
2.  Like Shabby Apple on Facebook
3.  Like Krafty Kat on Facebook
4.  Tweet about the Giveaway & include link in comment
5.  Blog about the giveaway & include link in comment

Winner must have a USA shipping address. Contest ends Tuesday, October 2nd at 12:00 midnight EST. The winner will be announced Wednesday, October 3rd.  Remember to leave a separate comment for each entry!
Good luck!
Pin It!