Friday, August 31, 2012

Fall Craft: Acorn From Terra Cotta Pot


I know it’s not quite September but I have already started getting the fall decorating bug.  This is one of those craft ideas that just kind of came to me out of the blue.  I always have ideas swirling around in my head, all sorts of possible projects.  I only get around to doing a tiny percentage of the things I would LOVE to do.  But, today, as I was cruisin’ around the clearance aisles in Walmart, I noticed that some of the terra cotta pots were brown.  My brain automatically connected the color brown to fall.  Then something just clicked as I was looking at one of these brown terra cotta pots that if I put the saucer on the top of the pot upside down, it looked kinda like an acorn.  So, I decided to bring it home with me to see what I could do with it. 


After I got it home, I saw this old cardboard tape spool and hot glued it to the top to be the stem.  Then I painted the top rim and the saucer tan. 

Then I attempted to free hand a criss cross pattern on the top but failed miserably.  I painted over it and then just painted a zig zag pattern.  Still not very good but better than before.  This would've looked much better with a paint pen or if it were painted by someone with much better skills than me.

  
I'm not totally sure if it really looks like an acorn or if maybe it is just me.  What do you think?  I put it here with my Fall blocks. 


 I think it is cute and I may end up making some more and putting them together in a grouping.  Couldn't you see these on opposite ends of a shelf or mantel?  Maybe even make different sizes...The really cool thing is that you can take the lid off and put something inside.  I thought it would be cute to put some squirrel nut zippers in it and use it as a candy dish. Do they still make those?  


Proud to be featured at:


Linking Up:
TDC Before and After
fall link party 
Pin It!

Thursday, August 30, 2012

Five Beauty Products In Your Kitchen (Five For Friday)

I’ve got a post for all you hot mamas out there to keep you looking gorgeous using just what’s in your kitchen cupboard! 

 Let’s face it, beauty products are expensive.  Most of what we’re paying for is that pretty package or the fancy name brand.  The actual stuff it’s made of can sometimes be scary. Not to mention the fact they just don’t deliver on all the promises.  Every time this happens, we go out and buy something else to replace the last thing that didn’t work until we have a whole cabinet full of overpriced, chemical-laden crap that we don’t even use. 

Now, I’m going to give you a list of 5 of the best ordinary ingredients that can do extraordinary things for your appearance:

1. Crisco

Yes, I said Crisco.  Many people think that shortening=lard (animal fat). Actually, the main ingredients in Crisco are soybean and palm oils.  Both of these ingredients are well-known as being great for the skin.  Doctors at Duke University Hospital refer to it as “Cream C”.  Plastic surgeons often recommend crisco because it speeds healing.  Gynecologists have even recommended it for vaginal dryness. (I don’t know if I would go that far!)  It gets rave reviews on Makeup Alley.  many actually refer to it as their “Holy Grail” of skin care and claim that it moisturizes as well as Creme de la Mar (one of the most expensive creams on the market).  Women use it as a cold cream and a makeup remover, as well as an overnight cream.  It can also be used along with your usual moisturizer to help lock in the moisture. It relieves dry, itchy skin and helps with eczema.  It also make a great heat protectant for flat ironing hair.  It is unscented and you can whip it to give it a lighter feel and even add essential oils for fragrance.

2.  Baking Soda

I’m sure you’re probably aware of the whitening benefits of brushing your teeth with baking soda.  But did you know that it works great to deep clean pores and treat acne?  It is also makes a wonderful face and body scrub.  It leaves skin super soft.  Some people like to add it to shampoo once a week to cut down on product buildup and some use it regularly to control dandruff.  I have even heard of it used as a deodorant.  Baking soda has antibacterial properties so it’s perfect for cleaning skin, teeth, and hair.

3.  Coffee

You already love your coffee but now, you’re going to love it so much more when you can use it to reduce cellulite!  Use the grounds alone or make a paste with yogurt that you apply to thighs and wrap with Saran Wrap.  You can also use the grounds (best to use while still warm) as a facial mask to tighten, brighten, and refresh tired, dull skin.  Brew up some dark roast and use as a hair rinse after conditioning to add richness to brunette, auburn, or dark blonde hair. 

4.  Sugar


To get the softest skin ever, use regular granulated sugar.  Sugar produces glycolic acid, an alpha hydroxy acid, which is a well known ingredient in many skin care products.  You can make a homemade sugar scrub by combining 1 cup sugar and 1/2 cup extra virgin olive oil (or other oil such as almond oil, coconut oil, or even baby oil)  and a few drops of your favorite scented essential oil.  The sugar rinses away clean with no stickiness.  All that will remain is baby soft skin.

5.  Extra Virgin Olive Oil


It's not just for cooking a healthy meal.  Some of the best hair care products I have ever used contained olive oil.  The same with skin care.  Why not just go straight to the source and save some serious money?  Make sure you get cold pressed extra virgin olive oil.  By not using heat, all of the nutrients, antioxidants, and vitamins are conserved.  It only takes is a few drops to tame frizzy hair and leave it shiny and soft.  Massage EVOO into your cuticles to help moisturize, repair, and protect.  You can use EVOO while shaving for silky smooth skin.  You can wash your face with olive oil because oil dissolves oil.  The oil will carry away unwanted dirt, oil, and other impurities and leave you with clear, dewy looking skin.  It actually helps clear up acne!  Use it as a makeup remover and it will condition your eyelashes too.  It is another one of those things that many women just swear by for moisturizing their skin and hair.    

Have you ever tried any of these natural beauty products?  Do you have one that is your "Holy Grail"?  


Linking Up:
Tidy Mom
Kitchen Fun With My Three Sons
504 Main
The Shabby Nest
One Creative Mommy 
Blissful and Domestic 
LizMarie Blog
Tatertots & Jello
Funky Junk Interiors
Too Much Time
Young & Crafty
Be Different, Act Normal
Six Sisters' Stuff
Cheerios & Lattes
Tutus & Tea Parties
Classy Clutter
Someday Crafts
A Crafty Soiree
House Of Hepworths 
Somewhat Simple
Pin It!

Giveaway Winner!!!!

Announcement:  We have a winner of the Downtown Tape Giveaway!   


Entry # 232
Libby, you won!  Check your inbox for a message and please reply with all of your contact info!
Thank you to everyone who entered and be on the lookout for the next great giveaway!
Pin It!

Wednesday, August 29, 2012

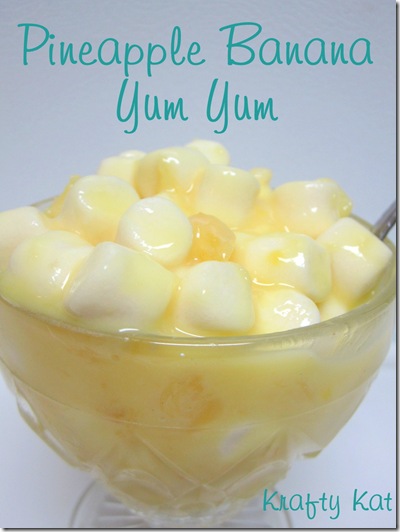
Pineapple Banana Yum Yum

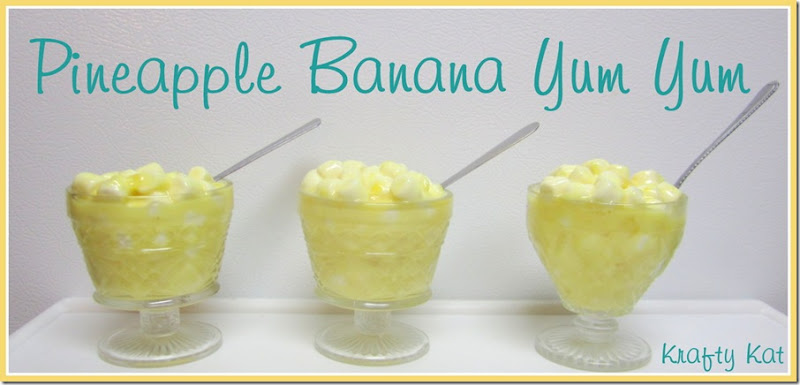
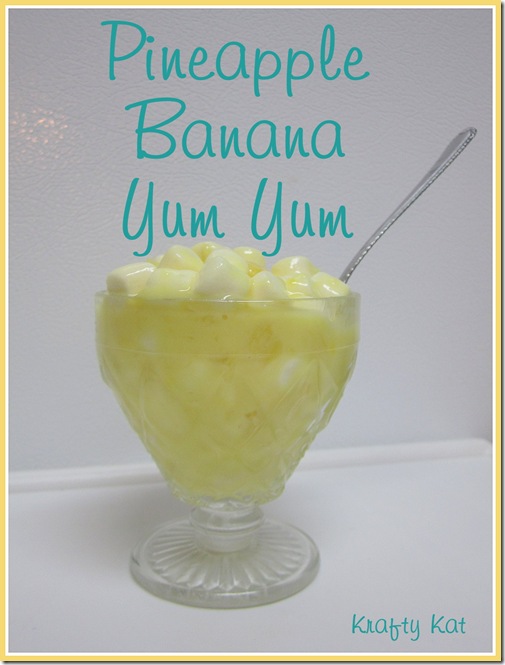
Pineapple Banana Yum Yum (Krafty Kat)

Before we officially say goodbye to summer, why not enjoy one last taste of how sweet it can be?  This Pineapple Banana Yum Yum  dessert will surely hit the spot!  Super easy to make and perfect for an afterschool snack!

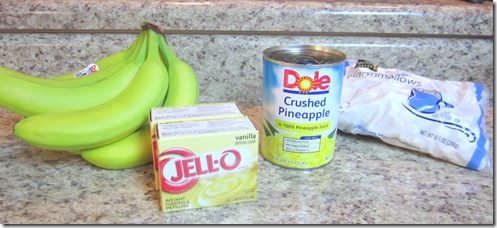
IMG_5370


Ingredients:
2 Boxes Vanilla Jello Instant Pudding
4 Cups Milk
4 Bananas
1 20 oz.Can Crushed Pineapple
1 10 oz. Package Miniature Marshmallows

Following the directions on the pudding box, combine both packages of pudding with 4 cups of milk.  Blend well. 

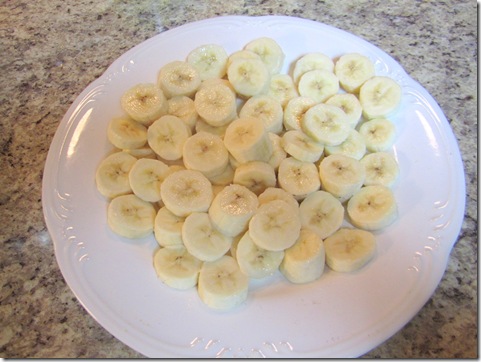
IMG_5372
 Chop 4 bananas and toss in.  Add the entire can of crushed pineapple and stir. 
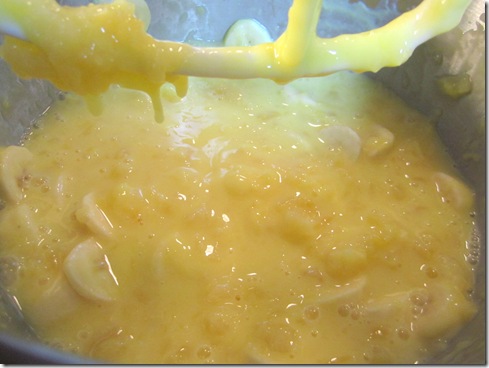
IMG_5377
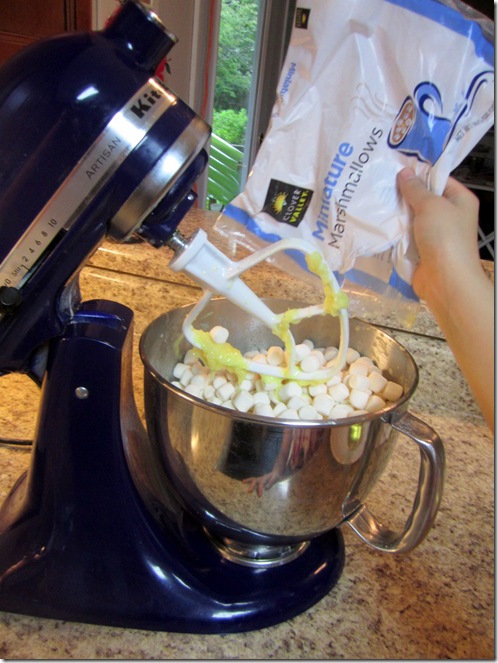
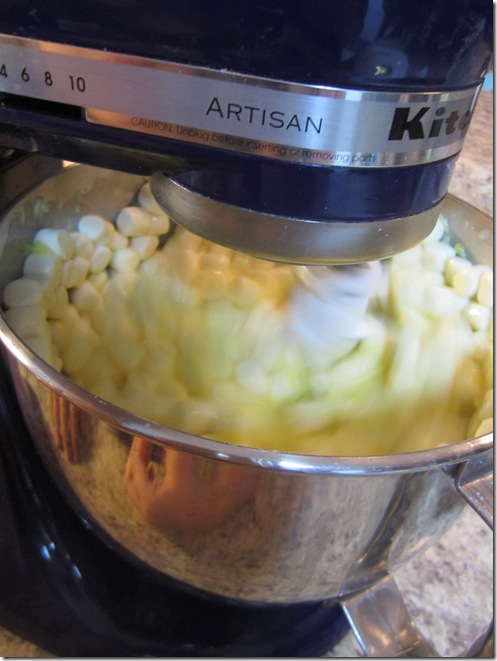
Then add the marshmallows and mix.  The marshmallows will mostly stay at the top but will mix in when served. 
IMG_5379
IMG_5381
Chill for at least 2 hours. 
Pineapple Banana Yum Yum Servings
The kids LOVE this dessert and love to help make it!  This is such a fun and easy treat! Perfect for summer or any time you want something light and refreshing with a hint of tropical flavor. 
Pineapple Banana Yum Yum 2


Linking Up Here:
Coastal Charm
A Crafty Soiree
House Of Hepworths
Tidy Mom
Kitchen Fun With My Three Sons
504 Main
The Shabby Nest 
One Creative Mommy 
Blissful and Domestic 
Liz Marie Blog
Tatertots & Jello
Funky Junk Interiors
Too Much Time
Young & Crafty
Be Different, Act Normal
Cheerios & Lattes
Tutus & Tea Parties
Classy Clutter
Pin It!

Tuesday, August 28, 2012

Steppin’ Up Our Dental Care With Waterpik


There are some perks to being a blogger.  Like receiving products to try and review.  Especially when they are AWESOME products like a Waterpik Complete Care and Waterpik Water Flosser For Kids.  I have to tell you we needed it.  We didn’t even realize how much we did!
image
We are probably an average family when it comes to dental care. We go to the dentist.  We brush and floss (OK, we don’t all floss all the time).  It just didn’t seem like we were really getting our teeth as clean as they could be.  With one child in braces, two with spacers, and my bridge and other dental work, we need the best oral care we can get.  We just have too much invested in our teeth. 

WP-900
Using the Waterpik has probably been the best way we could care for our oral health and hygiene at home.  Brushing alone is not enough!  The Waterpik Complete Care is up to 159% more effective than manual brushing.  The superior combination of water flossing and sonic brushing leaves you with a clean you can see and feel! 
From the very first time, it has been easy to use.  I have always struggled with flossing. One of the best things about it is no more stabbing myself in the gums with flossers, toothpicks, or other interdental brushes,aids.  Those things have hurt my mouth so many times.  This is pain free.  It just uses the force of water.  You can adjust the pressure to what you are most comfortable with and choose from 5 different tips.  It removes bacteria deep between teeth and below the gum line that traditional brushing and flossing can’t reach.  The sonic toothbrush is great too!  It has two speeds – fast and really fast!  It works so well at removing plaque and improving gum health and even has its own travel case!
image
I can really feel the difference!  My mouth feels cleaner than ever, my teeth look whiter and smoother and it only takes a few minute. Plus I know I am setting a good example for my kids.
WP-260

Speaking of the kids, they are loving the new Water Flosser!   It is so much easier for them to use than traditional floss.  They are actually excited about brushing now! The Waterpik Water Flosser For Kids is 3X as effective as flossing and 1000X more fun!  They loved decorating it with the decals that came with it.  The Waterpik Water Flosser is the best at reducing plaque, gingivitis, and gum disease.  They can’t wait to go back to the dentist and see what he’ll say about them now.  It’s so great for cleaning around braces and those spacers too!  It is quicker, easier, and way more effective than flossing. In fact, it’s been proven to be 3x as effective as dental floss and 5x as effective as brushing alone for cleaning around braces. I can be confident that they are really getting the best in oral care.
Back to School Savings


So, how clean is your mouth?  Not as clean as it could be with Waterpik! 
image
Disclosure:  I received free product in exchange for this post.  All opinions expressed are my own.
Pin It!

Monday, August 27, 2012

Gettin’ Krafty With It


Welcome to another week of Gettin’ Krafty With It!  I hope wherever you are, you are out of the way of Hurricane Isaac!  Looks like it’s gonna get nasty!

Here are some of the awesome projects you all shared last week:


twelve0eight made over a plain card table into something fabulous!


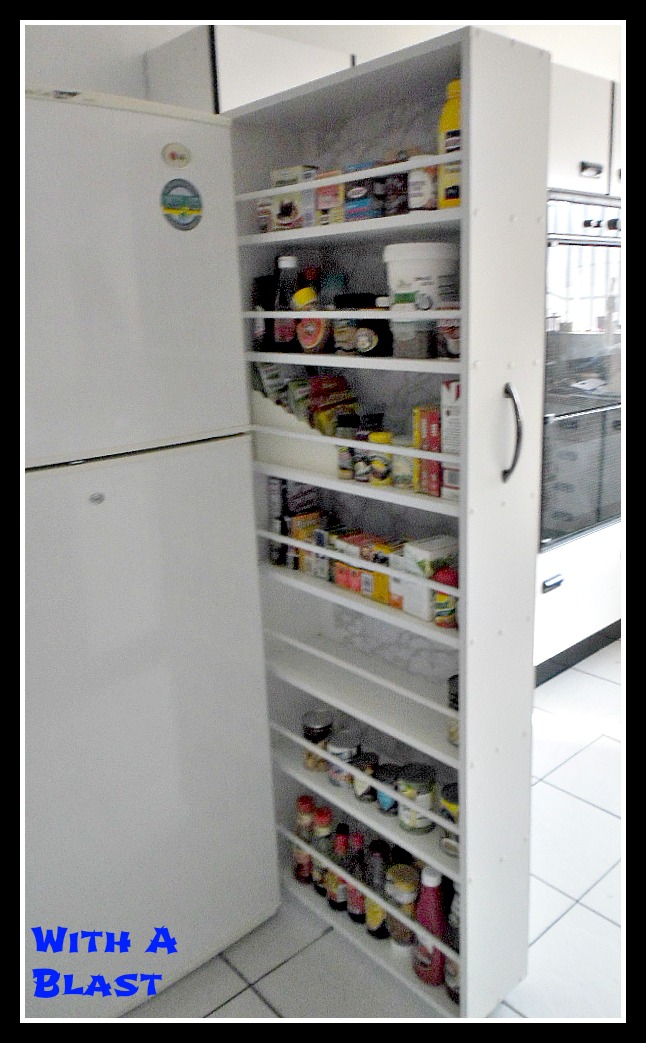
With A Blast made this amazing DIY grocery slider.  How handy to just pull it out and grab what you need.


My Party Passions shared the ultimate nerf birthday party complete with Justin Beiber target!


Design Stash Blog shared a tutorial for making these DIY wreath hangers.  These are also great for hanging a banner as shown here. 

Agape Love Designs shared how she made these Colorful Chandelier Earrings!  You’ll never guess what she used to get that gorgeous aqua
color!


If you were featured, grab this button! Don't forget, I'll be givin' you shout outs all over the internet: Google+, Facebook, Twitter, & Pinterest cause I'm cool like that!


Featured At Krafty Kat


There were so many inspiring ideas, you really made it hard to pick out just a few!  All of you are so creative and such a blessing to your families, your friends, and all of us that you share your projects with!

I say this because I know that sometimes as a blogger you can get caught up in the numbers and start to feel like you are going unnoticed or that as a mom your family is not appreciating all you do to make your house a home and their lives better.  I want to encourage all of you to continue to create and cook and design and figure out new ways to save money and time and to encourage others to do the same!  Make sure you visit someone else and encourage them today!  That little word of encouragement might just make their day and motivate them to keep on going and just whip up the best project they’ve ever made!  You can make that difference for somebody else!  Don’t miss out on your chance! 

If this is your first time to the party, I want to welcome you here and invite you to come back every week!  I would love for you to follow along however you'd like so you don't miss anything!  I don’t have a lot of rules for this party – anything goes (nothing obscene, of course)!  You can include this button on your blog or link back with a text link, if you’d like! 


Gettin' Krafty With It


Don’t forget to enter the Downtown Tape Giveaway before it ends tomorrow!
Pin It!

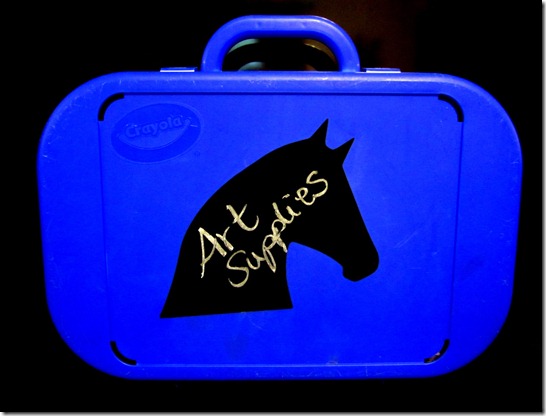
Chalkboard Horse Label


Chalkboard Horse Label

My daughter is in a class once a week that she needs to bring lots of arts/crafts supplies or anything she needs to feel creative.  She has a crayola art case but lots of the kids in the class have those so she needed a way to identify it as hers.  She loves anything to do with horses so we went online to find some clip art of a horse.  She picked out which one she wanted.  I saved the image to my computer then used the Silhouette to cut it out from chalkboard contact paper.  She can write her name on it or draw a picture and instantly know which one is hers.  She loves it!  I think it would be cute on the front of a binder or notebook too!   

 By the way, I am loving  the chalkboard contact paper!  I can’t wait to show you what else I have done with it in my kitchen!

Linking Up:
Skip To My Lou
Making The World Cuter
The Girl Creative
Craft-O-Maniac
A Bowl Full Of Lemons
DIY By Design
Someday Crafts
Coastal Charm
A Crafty Soiree
Shabby Creek Cottage
Tidy Mom
Blissful and Domestic
Six Sisters' Stuff
Pin It!

Friday, August 24, 2012

No Sew Drapes With Rod Pockets


IMG_5322
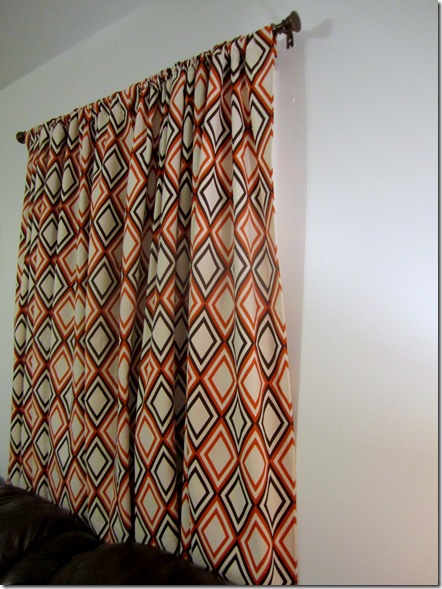
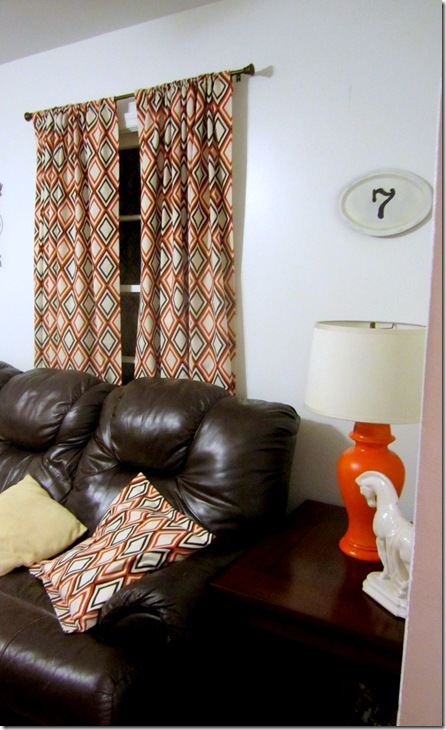
 I am so happy now to have some new curtains hanging up in my living room! 

I have to be honest - I am totally intimidated when it comes to doing anything with fabric.  I don’t sew and although I have lots of ideas for fabric related projects, they often go undone because I am so handicapped when it comes to sewing!  That’s why I get so excited when I know that I can pull off the look of sewing without actually touching a needle and thread! 


The first step of all is to measure your windows and determine how much fabric you will need.  It is best to overestimate so you don’t come up short.  You will need to allow for two inches all the way around each drape for the edges and six inches on the top if you will be making a rod pocket.  If you will be using clip-on rings, you need only allow for two inches on the top. 
IMG_5291

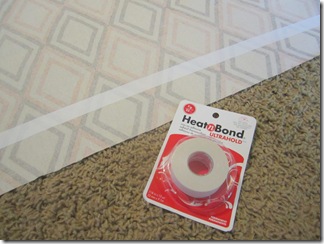
Next. pick out your fabric and get some Heat N Bond UltraHold.  I bought 6 yards of fabric and 2 rolls of the 7/8 inch wide Heat N Bond.  I really only needed about 5 yards of fabric and had enough left over to cover two pillows.  See?  It’s much better to overestimate! 

IMG_5286
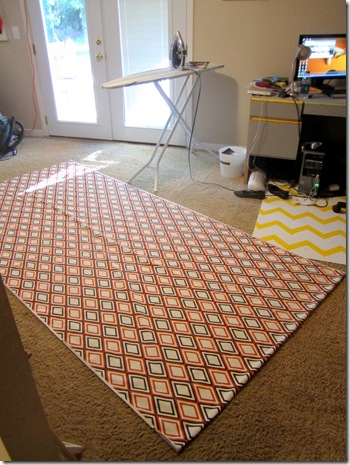
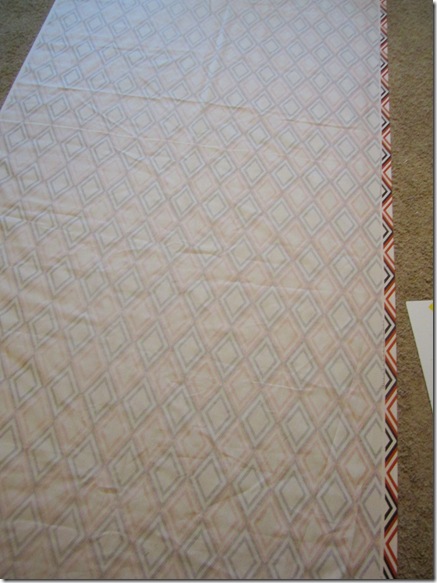
Lay out your fabric and fold in half to the size of each drape.  Cut the fabric along the fold in a straight line. Preheat the iron to medium heat with no steam.   On the back of one of the pieces of fabric, place the Heat N Bond adhesive two inches from the edge on one side. 


IMG_5294
 Be sure that the paper side is facing up. 

Place the iron on the paper liner and hold in place for 2 seconds to bond the strip to the fabric.  Repeat all the way down the strip until done.  Allow to cool and then peel off the paper.  You should have a strip of iron on adhesive on the fabric. 

  
 IMG_5292
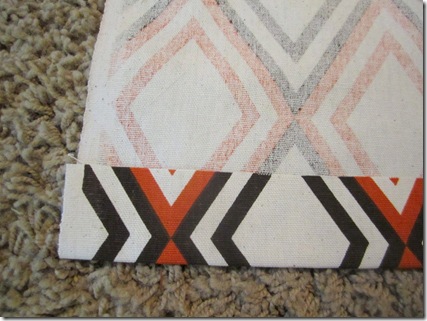
 Fold the fabric in until it meets the adhesive.
IMG_5298
   Press with iron and hold for 8 seconds on each section until the entire side is bonded.
IMG_5296
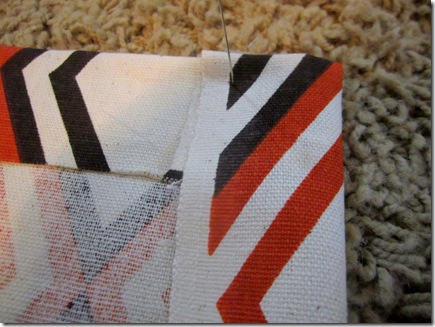
 Repeat on both sides and bottom.
IMG_5299

IMG_5300

To make a rod pocket for the top, measure six inches from the edge and place a strip of Heat N Bond.  Bond the strip to the fabric and remove the paper liner. Fold the fabric in until it meets the adhesive.  There should be a gap from where the fold is until you reach the adhesive.  This will be where the curtain rod goes. Iron along the adhesive until the entire side is bonded. 
IMG_5303
I prefer to use a rod pocket.  I know the clip-on rings are popular but I am not very fond of them.  For one thing, if you pull on the drape, it can come loose from the ring because it is only clipped on.  But, mainly, I don’t like them because they remind me of shower curtain rings.  On top of all that, I really didn’t want to add any more expense to this project and the cheapest rings I saw were about $15 (2 sets) so it is much more economical to just make a rod pocket.  If you love the rings, then just continue measuring in two inches all the way around and you’ll be all set.  If you make the rod pocket, you can still add the clip-on rings later if you want.
By the way, you can also make these drapes lined.  Simply bond the liner (a flat sheet works great for this) to the drapery fabric at the fold.  These were heavy enough without a liner so I didn’t feel I needed one.
Repeat the entire process for the second drape and then hang your new drapes.  Stand back and admire your handiwork!  Now you have nice designer looking drapes that didn’t break the bank!  Trust me, if I can do this, you can too!


IMG_5313

IMG_5320
For the pillow covers I used the same no sew technique.  I am loving the difference they make in my living room.  I plan on adding some more in different but coordinating prints.
IMG_5321

 After more pillows, my next step will be a rug and then some new wall decor.  One thing at a time...for now, I am just going to enjoy the fact that I've made a start!
IMG_5316


Linking Up At:
Tatertots & Jello
Be Different Act Normal
The Shabby Nest
Funky Junk Interiors
504 Main
Too Much Time
Blissful & Domestic
BoogieBoard Cottage
Tidy Mom
Young & Crafty
Nifty Thrifty Things
It's Overflowing
I Heart Naptime
Craft-O-Maniac
C.R.A.F.T.
Between Naps On The Porch
The Girl Creative
Making The World Cuter
Cozy Little House
A Bowl Full Of Lemons 
Alderberry Hill 
Reasons To Skip The Housework
DIY By Design
Coastal Charm
A Crafty Soiree
House Of Hepworths
Liz Marie
Pin It!